Using the SunSoft Print Client
 This section describes how the SunSoft Print Client works. The SunSoft Print Client is now provided as part of the Solaris 2.6 release. It was available previously only as an unbundled product.
A system becomes a SunSoft print client when you install the SunSoft print client software and enable access to remote printers on the system. The SunSoft print client commands have the same names and produce the same output as the print commands of the previous Solaris releases.
The Solaris 2.6 SunSoft print client commands use a greater number of options to locate printer configuration information than in the previous Solaris operating environment and the client communicates directly with the print server.
The print command locates a printer and printer configuration information in the following sequence:
- • It checks to see if the user specified a destination printer name or printer class in one of the three valid styles—atomic, POSIX, or context-based. See “Submitting Print Requests” on page 232 for more information.
- • If the user did not specify a printer name or class in a valid style, the command checks the user's PRINTER or LPDEST environment variable for a default printer name.
- • If neither environment variable for the default printer is defined, the command checks the .printers file in the user's home directory for the _default printer alias.
- • If the command does not find a _default printer alias in the .printers file, it then checks the SunSoft print client's /etc/printers.conf file for configuration information.
- • If the printer is not found in the /etc/printers.conf file, the command checks the name service (NIS or NIS+) if any.
The client does not have a local print queue. The SunSoft print client sends its requests to the queue on the specified print server. The client writes the print request to a temporary spooling area only if the print server is not available or if an error occurs. This streamlined path to the server decreases the print client's use of resources, reduces the chance for printing problems, and improves performance.
Printer Configuration Resources
This section describes the resources that the SunSoft print client commands use to locate printer names and printer configuration information.
The SunSoft print client commands can use a name service, which is a shared network resource, for storing printer configuration information for all printers on the network. The name service (either NIS or NIS+) simplifies the maintenance of printer configuration information. When you add a printer in the name service, all SunSoft print clients on the network can access it.
The SunSoft print client software locates printers by checking the following resources:
- • Atomic, POSIX, or context-based printer name or class (see “Submitting Print Requests” on page 232 for more information)
- • User's PRINTER or LPDEST environment variable for the default printer
- • User's .printers file for a printer alias
- • SunSoft print client's /etc/printers.conf file
- • Name service (NIS or NIS+)
Submitting Print Requests
Users submit a print request from a SunSoft print client by using either the lp or lpr command. The user can specify a destination printer name or class in any of three styles:
- • Atomic style, which is the print command and option followed by the printer name or class and the filename: lp -d <printer-name> <filename>
- • POSIX style, which is the print command and option followed by server:printer and the filename: lpr -P <server-name:printer-name> <filename>
- • Context-based style, as defined in the Federated Naming Service Guide in the Solaris 2.6 Software Developer AnswerBook: lpr -d <department-name/service-name/printer-name> <filename>
Summary of the SunSoft Print Client Process
This section summarizes the SunSoft print client process.
- 1. A user submits a print request from a SunSoft print client by using a SunSoft print client command (lp or lpr).
- 2. The print client command checks a hierarchy of print configuration resources to determine where to send the print request.
- 3. The print client command sends the print request directly to the appropriate print server. A print server can be any server that accepts BSD printing protocol, including SVR4 (LP) print servers and BSD print servers such as the SunOS 4.x BSD print server.
- 4. The print server sends the print request to the appropriate printer.
- 5. The print request is printed.
Setting Up a Print Client by Using Admintool
 You can use Admintool to set up access to a network printer or to configure a local printer. To use the Admintool: Printers windows, you must be a member of the UNIX sysadmin group (GID 14).
To set up a print client, you need this information:
- • Printer name
- • Print server name
- • Description
- • Whether this is the default printer for the print client system
Use the following steps to access a network printer:
- 1. (If necessary) Type admintool& and press Return to start Admintool.
- 2. From the Browse menu, choose Printers. The Admintool: Printers window appears as shown in Figure 11-2.
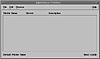
Figure 11-2 The Admintool: Printers window.
- 3. From the Edit menu, choose Add and Access to Printer. The Admintool: Add Access to Printer window appears, as shown in Figure 11-3.
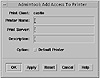
Figure 11-3 The Admintool: Add Access To Printer window.
- 4. Enter the Printer Name, Print Server Name, and Description.
- 5. If you want this printer to be the default printer, click the Default Printer checkbox.
- 6. Click OK. The printer is configured and the printer information is added to the list in the Admintool: Printers window.
)
)
)
)