Follow these steps to set up a printer port monitor:
- 1. To register listen service 0, type pmadm -a -p tcp -s 0 -i root -m 'nlsadmin -c /usr/lib/saf/nlps_server -A 'xmodified_address '' -v 'nlsadmin -V' and press Return. The port monitor is configured to listen for requests from listen service 0.
- 2. To receive print requests from SunOS 5.0 print clients, type pmadm -a -p tcp -s lp -i root -m 'nlsadmin -o /var/spool/lp/fifos/listenS5' -v 'nlsadmin -V' and press Return. The port monitor is configured to listen for requests from listenS5, which registers print requests from SunOS 5.x print clients.
- 3. To receive print requests from SunOS 4.x print clients, type pmadm -a -p tcp -s lpd -i root -m 'nlsadmin -o /var/spool/lp/fifos/listenBSD -A 'xaddress'' -v 'nlsadmin -V' and press Return. The port monitor is configured to listen for requests from listenBSD, which registers print requests from SunOS 4.x print clients.
- 4. Type cat /var/saf/tcp/log and press Return. Examine the messages displayed to make sure that the services are enabled and initialized. In this example, all three network listen services are registered:
# lpsystem -A
ØØØ2Ø2Ø3819418ØeØØØØØØØØØØØØØØØØ
# pmadm -a -p tcp -s lp -i root -m `nlsadmin -o
/var/spool/lp/fifos/listenS5` -v `nlsadmin -V`
# pmadm -a -p tcp -s lpd -i root -m `nlsadmin -o
/var/spool/lp/fifos/listenBSD -A
'xØØØ2Ø2Ø3819418ØeØØØØØØØØØØØØØØØØ'` -v `nlsadmin -V`
# pmadm -a -p tcp -s Ø -i root -m `nlsadmin -c
/usr/lib/saf/nlps_server -A
'xØØØ2ØACE819418ØeØØØØØØØØØØØØØØØØ'` -v `nlsadmin -V`
pine# cat /var/saf/tcp/log
1Ø/28/91 1Ø:22:51; 178; @(#)listen:listen.c     1.19.9.1
1Ø/28/91 1Ø:22:51; 178; Listener port monitor tag: tcp
1Ø/28/91 1Ø:22:51; 178; Starting state: ENABLED
1Ø/28/91 1Ø:22:51; 178; Service Ø: fd 6 addr
xØØØ2ØACE819418ØeØØØØØØØ000000000
1Ø/28/91 1Ø:22:51; 178; Service lpd: fd 7 addr
xØØØ2Ø2Ø3819418ØeØØØØØØØ000000000
1Ø/28/91 1Ø:22:52; 178; Net opened, 2 addresses bound, 56 fds free
1Ø/28/91 1Ø:22:52; 178; Initialization Complete
#
Setting Up a Local Printer by Using Admintool
You can use Admintool to set up access to a printer or to configure a local printer. Use the following steps to access a network printer:
- 1. Type admintool& and press Return to start Admintool (if necessary).
- 2. From the Browse menu, choose Printers. The Admintool: Printers window is displayed, as shown in Figure 3-16.
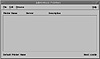
Figure 3-16 The Admintool: Printers window.
- 3. From the Edit menu, choose Add and Access to Printer. The Admintool: Add Access to Printer window is displayed, as shown in Figure 3-17.
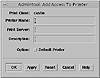
Figure 3-17 The Admintool: Add Access to Printer window.
- 4. Enter the printer name, print server name, and description.
- 5. If you want this printer to be the default printer, click on the Default Printer check box.
- 6. Click on the OK button. The printer is configured and the printer information is added to the list in the Admintool: Printers window.
Use the following steps to add a local printer:
- 1. Type admintool& and press Return to start Admintool (if necessary).
- 2. From the Browse menu, choose Printers.
- 3. From the Edit menu, choose Add and Local Printer. The Admintool: Add Local Printer window is displayed, as shown in Figure 3-18.
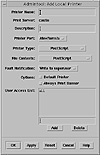
Figure 3-18 The Admintool: Add Local Printer window.
- 4. Enter the printer name and description.
- 5. Choose the printer port, printer type, file contents, and fault notification.
- 6. If you want to specify this printer as the default printer, check the Default Printer check box.
- 7. If you want to always print the banner, check the Always Print Banner check box.
- 8. Modify the User Access List (if necessary).
- 9. When you have completed the setup, click on the OK button. The printer is configured and the printer information is added to the list in the Admintool: Printers window, as shown in Figure 3-19.
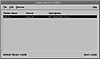
Figure 3-19 The Admintool: Printers window.
)
)
)
)
)
)
)
)